Hot tub delivery preparation, location and more
Route from the street to your desired location.
Our spa prices generally include 3 man delivery up to 50 miles from our store. Hot tubs weigh up to 1000 pounds, there are no handles and they are fragile when being moved. We cannot “carry” them to the site. We deliver using a standard snowmobile trailer and pickup truck. Ideally we back the truck and trailer into your yard (assuming it’s dry) and get the trailer as close as possible to the final resting place. If you have a shared side yard and it may be necessary to drive on your neighbors property, make sure you ask for permission prior to the delivery. At that point we tilt the trailer and slide the spa onto 3” x 10’ long pvc pipes. We use the pipes like railroad tracks to slide the spa. Our trailer requires a 100” wide minimum width to pass through. If the area where you want the hot tub is inaccessible, if we can’t drive our truck to the spot, we need to know about that in advance. Most times it is still possible to get the spa where you want it but we need to plan on moving it manually around the house and into place. That requires different equipment and sometimes an extra charge for additional labor or equipment. Please discuss these circumstances with us prior to delivery. Use a tape measure and take actual measurements of any narrow areas we will need to pass through, no guessing is allowed here. Take photos, email them, etc. If you have dogs, please pick up any bombs that may be in your yard and would contaminate our equipment. Move any obstacles out of the way. Furniture, grills, etc. For indoor deliveries measure and remove doors if needed and clear the path.
Final hot tub location.
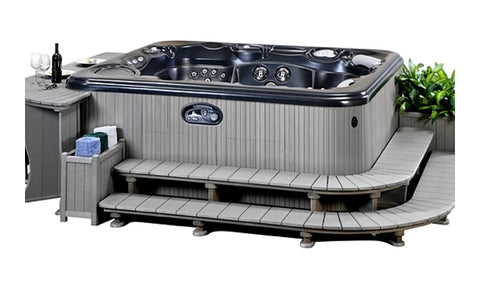
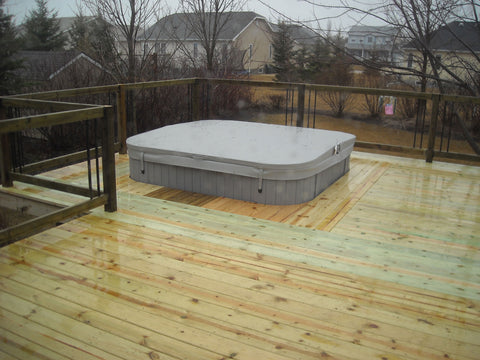
Standard delivery means “delivered to an area where 3 people can safely get the spa to, with reasonable effort” An “at grade” deck without railings, (24” or less off the ground), a level concrete pad, a level paving brick patio, a level pea gravel, crushed limestone or 3/4”gravel pad, etc. All of these are good choices. Elevated decks, decks with railings, decks with a recessed area for the spa to set into, low areas that don’t have much potential for air movement, concrete pitched more than an inch over the area of the spa, cracked, heaved or sunken concrete, areas with limited access, too close to walls, areas with a low overhang or ceiling are generally not good choices. If you are planning to install your spa in an area with a low ceiling like a car port, make sure the ceiling is high enough to allow your cover to open. An 84" diameter spa will require at least 48" to 50" of clearance from the top edge of the spa. So a spa that is 38" tall and 84" in diameter would need about 88" from floor to ceiling to provide enough overhead clearance to open the cover.
How much access around the spa is needed?
Today’s highly efficient perimeter insulated spas are designed so that the entire area inside the spa cabinet stays warm and is accessible by removing side panels. This is far superior to old “full foam” technology. In addition to all areas being accessible, the stored heat in the 3000 pounds of water is shared with the air space, pipes, pumps and electronics located within the insulated perimeter of the spa cabinet. This also means that components can be comfortably spaced within that area rather than all be packed into a small un-insulated and vented equipment compartment as was the case in the old days with full foam insulated spas. For that reason it is recommended that all sides of a spa be accessible. Ideally there should be at least 24” of clearance to all sides of a spa from the base all the way up to the top.


The view is better if you aren't sitting at ground level too.
If you choose to put your spa tight to a wall or into a corner you will be responsible for draining and moving the spa out in the event that service to any of the components located within those “now inaccessible” areas is needed. Sometimes that also means you will need to disconnect and reconnect your electrical wiring to facilitate moving the spa. Please keep this in mind when considering a location that limits or inhibits access to your equipment.
Hot tub platform / foundation.
The spa should sit on a completely level area that has uniform support. If you have a pitched concrete pad the water will be deeper on one side and over time this may affect the spa. Uniform support is crucial. You cannot have any unsupported areas under the spa, support must be uniform. For this reason you cannot use shims to level a spa that is on a pitched concrete pad. Shimming will cause the spa to deform over time and will eventually destroy the spa. If your concrete is cracked, sunken, or heaved it is NOT an acceptable place for a spa. You will definitely destroy your spa in a short period of time. The 3000 to 4000 pounds of water weight will force the spa into the shape of the cement below it. Pipes can break, the spa shell can crack, it’s a bad situation so make sure your area is level with uniform support over the entire footprint of the spa. Problems that occur due to improper support are not covered under any warranty. Whatever you choose as your level and uniformly supported hot tub pad, make sure it it ready for the hot tub to be moved onto before scheduling your delivery. We do not provide labor or materials for that level supported area, that has to be completely finished prior to scheduling your delivery.
Is it possible to modify a pitched or non uniformly supported area?
Yes it is. If you have a pitched concrete pad that you would like to use for your hot tub, it is possible to level an area the size of the spa footprint. This can be done in a few ways. It is possible to build a treated wood platform that is pitched in the opposite direction of the concrete to neutralize the pitch. Such a platform must be constructed using several pitched rails under a 1/2” or 5/8” treated plywood top. Usually at least 5 or 6 pitched rails made from ripping treated 2 x 4 lumber at your pitch are needed for proper support. The treated plywood is then attached to the top of the pitched rails and if properly built, will acceptably support the spa. Another less expensive option is this. With several strong people, drain and disconnect the spa then tip it up onto it’s side right next to the final resting spot. Lay some cardboard or other material down first so the spa cabinet does not get scratched. Pour several bags of decorative pea gravel (usually 5 to 7 bags) onto the low or sunken areas of the pad. This will fill in the low areas. Using a bubble level on top of a straight 2 x 4 you can create a level uniform pea gravel platform the same size or slightly larger than the base of the spa on top of a pitched or sunken concrete pad to set the spa down onto. Ideally it’s a good idea to contain the pea gravel inside a frame of some type but once the spa is set down on top of the gravel, most of it will stay in place as the weight of the spa is preventing it from spilling out the sides. Once your pea gravel is level, carefully set the spa back down onto the gravel without sliding it.
Hot tub orientation.
The spa should be oriented to achieve a few goals. Don’t worry about what side the electrical connection is on. The power can be brought into the spa at any point around the perimeter by drilling a small hole in the black base at the bottom of the spa, then routing it inside the cabinet to the equipment pack. The first goal should be that the seats are facing a good direction for nice views. You don’t want the best seats in the spa facing a wall. If you have a nice view in one or more directions, orient the spa so that the nicest seats face the nicest views. The second consideration is the topside control panel. You want that in a place where you can get to it without too much trouble, but the seating direction should be the first priority. In every case good access to all sides of the spa is always the best choice. As mentioned earlier, spas have components and moving parts on all sides. Recessing a spa down into the ground or into a deck limits or prevents access to the sides, prevents efficient service, the lack of air movement deteriorates the equipment at an accelerated rate, and is not recommended.
Below are a few examples of installations that are NOT recommended because they limit or eliminate service access. In addition, when ground moisture is present and air flow is limited, accelerated deterioration of components also occurs.
This type of installation is NOT recommended

This type of installation is NOT recommended

This type of installation is NOT recommended and climbing up to the deck to get out isn't easy.
When on a deck or patio, if at all possible ALL SIDES should be at least 18” to 24” away from immovable objects. As mentioned previously, in the event a repair is needed and a side panel cannot be removed because it’s recessed or too close to another object, you will be required to drain and move the spa so the sides can be accessed. Sometimes this will also require disconnecting the power, moving the spa then reconnecting the power for proper testing. None of this is included in any manufacturers warranty. It is the customer’s responsibility to provide access to all areas of the spa if needed for service. The best practice is to provide reasonable access to all 4 sides of a spa. If you want your spa to feel recessed, consider building a removable step or deck sections around it.
Cover locks
Our spa covers generally include locking straps, lock hardware and screws but they are not mounted to the cabinet of your spa.

It is up to the homeowner to install those locks onto the spa cabinet if they so desire. We do not include that in our program. Normally the reason for locks is to keep wind from blowing the cover open. We’ve found that the cover can more easily be secured against wind by fastening a short rope from the cover handle down to the cover lift bar at the bottom of the spa on the side that the cover folds off to, and by installing a short piece of Velcro or 3M Dual Lock on the lip of the spa and the back side of the cover flap on the entry side. That way, to open the spa you simply pull outward on the cover flap on the entry side to disengage the velcro.

The rope on the other side never needs to be undone as it will bunch up when you open the cover and tighten back up when you close it. To secure the entry side you simply press the Velcro or Dual Lock with the palm of your hand and it locks in place. This system avoids drilling holes in your cabinet and having to walk all the way around the spa to unlock all 4 straps every time you want to use it. Also in winter the locks can become frozen and brittle and are not very reliable. If for security reason you want us to install the locking straps we can arrange that for a small additional charge. Please talk to us in advance about that if desired.
Sequence of events.
Once the route from the street, final hot tub location, hot tub foundation, and seating orientation have all been taken into consideration and found to be acceptable, we can schedule your delivery. We generally deliver weekday mornings arriving about 8:30 to 9:00 am depending on how far from our store you live. Once your spa is in place, we can rotate the spa for the best seating orientation. We will also determine the best direction for your cover lift (if applicable). On a square spa the cover lift can be mounted so it folds off to any side. Whatever side that is will require about 18” of clearance to a wall, and about 3” on each side of the spa. When open, the cover will stick up 1/4 of the spa’s diameter creating a wind break or privacy screen. You would normally not want the cover lift to fold to the direction of your nice view but it can be used to block the neighbors view into your spa. If your spa is a rectangle the cover can only be mounted one of two ways going off onto either of the shorter length ends. We will install your cover lift at the time of the delivery and train you on how to use and care for your spa. It’s best for anyone who will be using the spa to be present during that training rather than one person being responsible for hot tub care. The delivery, cover lift installation and training normally takes 45 to 90 minutes total. When we leave, you will have the knowledge to fill, start up, and maintain you new spa. Printed documentation is also included.
Electrical connection.
Almost all hot tubs are direct wired or “hard wired”. By law this needs to be done by a licensed electrician, we cannot do any of your electrical wiring for you. The best practice is to have your electrician scheduled to arrive right after we have your spa in place, in winter, preferably the same day. The spa must be in place before the electrical service can be connected. Some electricians prefer to do the preliminary indoor part of the connection in advance and come back after the delivery to complete the connection. Our spas are perimeter insulated and do not have any specified electrical entry point. This allows the electrician to enter the spa at any point around the perimeter through the black base, the lower 4” of the spa. (not through the cabinet panels) Once inside the cabinet, the wires can be routed to the side where the power pack is located. When the connection is complete, the power should be turned on for about 10 seconds maximum to test it, then should be turned off and remain turned off until the spa is completely full. The opening drilled into the base for the conduit should be properly sealed up around the conduit so that rodents and bugs cannot enter. Contact us for specific electrical specifications as they differ depending on the model.
If we are hauling away an old spa.
If you currently have an old hot tub that we are going to remove and dispose of for you, we normally do that at no charge at the time of delivery of your new spa. We cannot take spas that are falling apart or have been cut apart, only intact spas can be transported. You should dispose of any small pieces in trash bags taken to the street for your normal trash pickup. If the spa is intact, please make sure it is completely empty, dry if possible. Even a few inches of water remaining in the bottom of a spa can add over 100 extra pounds of weight. Make sure it’s totally empty. You should also remove the electrical wiring from your old hot tub prior to our arrival. By law we are not licensed to perform any electrical work on your old or new spa. If you are planning to do some renovation on the area where your current old spa is sitting, and you want your old spa removed before we deliver your new spa, that can be arranged but, since it will require a separate trip, there will be additional costs involved. Instead, it’s best to temporarily move your old spa off to the side where it isn’t in your way and we can haul it away when we deliver your new spa. In any case make sure the area where your new spa will be placed is level and uniform. If you have any doubt, move your old spa out of the way in advance so you can take the time to prepare the area for the new spa. We cannot do any leveling of your intended spa pad at the time of the delivery.
Winter startup.
Our new spas are kept at 70 degrees or so in our store. Due to the efficient perimeter insulation systems, interior components, pumps, heater and electronics, will stay above freezing for 24 hours or so in sub freezing conditions. (That may be less time in very sub freezing conditions.) After about 24 hours sitting outside, not full and running, those components will freeze. Normally this is not a problem because the factory blows 99% of the test water out of the pumps, pipes, and equipment. However….. if there is even as little as 1 oz of water sitting in a pump, that 1 oz of water will freeze and will prevent that pump from starting. No pump = no heat. During these months it is really important to get the electrical connection done the same day we deliver the spa. If the spa sits for several days in freezing weather it’s very possible that 1 oz of ice that may be in the pump will prevent the spa from starting up once connected. To avoid this situation either get it running the same day as delivery or prevent the temperature inside the cabinet from dropping below freezing. This can be done in most cases by placing a very small cube heater inside the cabinet positioned so it won’t melt anything and with the cabinet panels all in place to hold the heat in. It’s also possible to place a small cube heater inside the actual empty spa with the cover on. The small amount of heat will flow through the spa shell into the insulated airspace around the spa and keep everything from freezing. Either system works fine as long as you are sure the heater is placed far enough from surfaces so nothing gets melted or starts on fire. Best practice is to get the spa up and running on the day of delivery.
Winter startup & you only hear a hum.
As mentioned above, if there is as little as 1 oz of water sitting in a pump, that 1 oz of water will freeze and will prevent that pump from starting. No pump = no water flow = no heat. If the spa has been sitting in sub freezing weather prior to being started up, you finally have the power connected, you fill it, turn on the breaker, and all you hear is a hum, there is a good chance you have ice in your pump. The display on most spa controls will also show “FLOW” or “DRY” in this situation. The small chunk of ice frozen inside the pump is preventing the pump from starting. THERE IS NOTHING WRONG WITH YOUR SPA. If the power is left on the spa will try to run, shut down for a while, and try again later. This isn’t a good situation but it isn’t going to destroy your spa unless left like this for a long time. In some cases the small amount of heat from the 57 degree cold water you just filled it with might thaw out that ice chunk in an hour or two but it’s also possible it may not. For that reason the best solution is to turn off the breaker, open a cabinet panel or remove a corner, strategically place a small electric cube heater inside the cabinet situated near the main circulating pump. (Be sure to place it where it won’t melt anything.) Replace the panel, and wait for 3 or more hours for that heat to make it’s way to the frozen areas and thaw everything out. After a few hours of the cube heater running, try turning the breaker back on and if the ice has melted everything will start up as normal. You can buy a small cube heater for under $50.00. We have a few that we loan out too so if you don’t have one you can borrow one of ours if available.
Deliveries when there is snow and ice.
We deliver hot tubs year round. With the exception of super cold or blizzard type of weather, we can usually deliver and set up your spa. To make sure we are able to deliver your spa, keep the area where the spa is to be placed clear of snow and ice. It’s a good idea to shovel and salt the area immediately after we get snow or ice. If you wait until the day before your delivery it may be next to impossible to clear the area appropriately. During winters when we have lots of snow, you will also want to keep a path cleared through your yard or whatever the route from the street to your spa site is. If you have a snow blower, clear a path wide enough for a truck and trailer, roughly 100” minimum. We do have a 4 wheel drive vehicle for deliveries but if the snow is too deep even with 4 wheel drive it may not be possible to deliver until the snow has been removed from the area.
Hot tubs in Winter
Winter hot tub use is absolutely the best!

Nothing beats soaking in 104 degree water on an ice cold sunny day or a beautiful crystal clear cold night. Winter is the best time of year to enjoy a spa because of the amazing contrast between the cold crisp air and the crystal clear 104° water.
Outdoor spas in winter months need to be maintained in one of two ways. The best way is, filled to the proper operating level, checked on every few days, and kept at a temperature of over 100 degrees. The other option is to winterize it. Winterizing means that you drain it completely dry, use a wet vacuum to suck 100% of the water out of all lines and pumps then add non toxic RV antifreeze to the lines so that any water that may still remain in the lowest lines is diluted preventing freeze damage. If you would like to have your hot tub professionally drained and winterized give us a call we can set that up for you.
A spa cannot just be drained and left to freeze in winter. Severe damage will occur in almost all cases. In an emergency newer perimeter insulated spas can be kept safe from freezing by careful placement of a cube heater inside the enclosed cabinet area. Full foam insulated spas must be kept at full operating temperature or drained and winterized as mentioned above. There is no way to prevent the pipes around a foam insulated hot tub from freezing because they are isolated in foam.
In the event of a mechanical problem during sub freezing weather we will try to take care of issues if possible, but for the personal safety of our service people we cannot do service work outdoors in winter months when weather conditions may be considered dangerous. Air temperature, wind, and precipitation all factor into the conditions we may consider unsafe. We recommend spa owners should also own a wet vacuum and small cube heater to keep your spa safe in the event of a failure in dangerous weather. Damage caused by freezing is usually covered by your homeowners insurance but is never covered by any manufacturers warranties regardless of the cause.
Hot tubs at vacation homes.
Who doesn’t want a hot tub at their cabin, vacation home, and weekend getaway? There’s no better way to relax. Unfortunately hot tubs don’t do very well when they are ignored for weeks at a time. For that reason it’s a really good idea to find and train someone that lives in the area of your vacation home to come over at least a couple of times a week to check the pH, check the sanitizer levels, water level, etc. It takes literally about 2 minutes.
If you have someone nearby you can trust, let them use your spa when you aren’t there in exchange for them taking care of it for you in your absence. 80% to 90% of hot tub mechanical problems are caused by poor water chemistry. Low pH, high pH, too much sanitizer, no sanitizer, all of these issues slowly eat away at your equipment and will ultimately cause equipment failure. Manufacturers warranties cover defects in materials and workmanship, but this kind of equipment damage due to poor water conditions is not covered by manufacturers warranties. We will happily train anyone, just send them into our store.
If you would like to monitor your hot tub remotely from any smartphone we have just the device for you, click here for the ICO.